Tuesday, 3 January 2012

The Walkabout Part 2 Food on the Go


            I am one of those people that you see walking around stuffing his face as he walks, the guy who does that weird stutter step to avoid spilling whatever he is eating all over himself. Yeah that is me. Part of any good walk about is finding snacks and meals on the go between your favourite bakery and your butcher. These are the spots that I hit while I am on the hunt for what I am going to cook for dinner. These three joints have never disappointed me so give them a shot. Three very different styles of food that make me want to try and cook that food. As much inspiration as I get from reading cook books and playing with food in the kitchen, when I taste something great it makes me want to cook so much more. So here are the spots that I hit on the walkabout.

            When I am walking around Chinatown I always get an urge for noodles. I am a huge fan of the whole noodle experience, the sticks, the white box, the whole thing. I dig it. So when I find myself in Chinatown I always seem to be drawn to the Noodle Box on Fisgard. They offer curries and won tons and a bunch of other things but for me, I am all about the Kung Pow Chicken. Simply put it is killer. I loves it. You can find them at http://thenoodlebox.net to check out menus and a little history about their biz.

            Sometimes a person just needs, and I mean needs, a BBQ fix. Now I will insert a little rant here, throwing something on a grill in your back yard is not barbequing it is grilling. Grilling is great and I do it a lot but it is not the real deal. Barbequing involves smoke, time and a little bit of magic. It is all about depth of flavour and if it is done well it is awesome. Now that is out of my system let’s grab some barbeque. The joint you should hit is Pig. Offering up brisket, pulled pork, smoked chicken, ribs and the most massive dill pickles it is all great. This is definitely a stutter step joint. They also offer up a good selection of bourbons if you are going to stay. I also recommend trying the crispy fried mac and cheese. Let’s be honest how can that not be good. Check out the menu at http://pigbbqjoint.com This joint is awesome and fills the hunger gap like few others.

            I have a soft spot for food trucks and stands. Maybe it comes from being a kid at the fair and convincing my mom to get me Mr. Spud fries. So I was so happy to see a taco stand go up in my neighbourhood I almost wet myself. Well maybe not but I was very excited none the less. So now we find ourselves at La Taquisa. Handmade tortillas, great fillings and a killer tortilla soup can all be found at this spot. The cool thing about this little stand is that all the recipes are from one family. You can check out photos of the family on their website. I am a huge fan of their beef burritos as well as the Rajas but everything that I have had there has been stellar. Great service comes standard with your meal. I have had the opportunity to get to know the folks who run this spot and Scott and Cindy are some of the nicest folks you could hope to meet. They are always welcoming and thankful that you have come in to eat their food whether it is five burritos or one taco. They are truly awesome people and you should always support awesome. Check them out at, http://www.lataquisa.com   

            So there are some places that you should check out on your own walkabouts. They are places that I love. There are of course many more but these are the ones I keep going back to. If you have any places that you think I should hit on my next walk feel free to let me know about them either by comments or hit me with an email. Cheers.

Pasta via The Black Box


            Today I am thinking about pasta and all of the wonderful things you can do with it. My friend Jill, who has become very interested in cooking as of late, asked me to put a pasta recipe up so here it comes. This recipe was a happy success which came from a black box challenge that my buddy Toby and I randomly decided to do. Toby picked three ingredients for me and I did the same for him. We had to create two dishes each using our mystery ingredients and his girlfriend Tiffany reaped the benefits of Toby and I screwing around in the kitchen. I was given shellfish, tomatoes and beer. The wheels began to turn furiously and the result was this pasta dish. In the following recipe I have substituted wine for beer just because in my own mind it is a little more “classic” and pairs with the shellfish a little bit better. You are more than welcome to keep the beer in rather than using the white wine. If you are going to use the beer choose something in the middle of the beer spectrum not too light and not too stout. I think I used a good IPA and it worked great. You will want to go light on the portions on this one as with all of the butter and cream it is fairly rich. But like the squirrel in Enchanted says... “Its goooood.”

Prawn and Tomato Spaghetti in Cream Sauce to the tune of “The General” by Dispatch

6 large prawns 8/10 if you can find them, a few more if they are smaller* shelled and deveined. 2 roughly chopped 4 whole.
¼ cup of butter
¼ cup flour
1 cup of whole milk
2 cloves of garlic minced
¼ cup good parmesan or asiago cheese plus a little for garnish
2 tomatoes skinned and seeded, roughly chopped.
¼ cup white wine... Remember if you wouldn’t drink it you shouldn’t cook with it.
A fist full of spaghetti
A splash of olive oil
Salt to taste


*The fraction that you see when you are buying shellfish, like 8/10, refers to the size of the shellfish you are buying. So you will get somewhere between 8 to 10 prawns per pound. Just in case you were wondering.

-Bring a pot of salted water to a boil for your pasta, add in some oil.

-In a small sauce pan make a roux. This is a French technique for thickening sauces as I understand it. Melt your butter and add your flour to create a paste. Do this over a medium heat.

-Add in your milk and cheese and reduce heat, let it simmer. If it gets a little thick just add a little bit more milk. Whisk the crap out of it until it is smooth.

-Drop your pasta into the water and cook until it is about 80% done.

-In a large sauté pan add oil, garlic and prawns. Whole ones first and chopped ones second. Add in your wine. Cook until they just start to turn pink. Remove the whole prawns and set aside.

-Add your sauce to the pan, use your judgement in the amount of sauce you add, it should be enough to coat the pasta not drown it. Add your pasta and tomatoes, toss or mix everything together. This should finish cooking everything.

-Plate up your pasta and top with a whole prawn and a little bit of cheese to garnish. Like that you got yourself a rocking pasta dish.

Give it a go and don’t be afraid to play with your food. It works great scallops too.  


Monday, 2 January 2012

Some Dressings for Your Salads


            As I have stated to pretty much anyone who will listen is the fact that my Grand had a huge influence on my love for food. Watching her cook from a very young age I was enamoured from the start. One of the many things that comprised a Grand meal was, no matter what, there was a salad on the table. In our house it was part of the family style dining, served with the meal not before hand. That was just the way that Grand rolled. The table would be littered with all manners of bottled salad dressings each specific to those who were eating: French for my grandfather, Thousand Island for my mom, Ranch for me and oil and vinegar for Grand. As I started to cook more and more I realized that made from scratch was better than what was bought in a bottle so I started making my own salad dressings.

            I started with a very simple vinaigrette, and then started to play with what I put in it. I would attempt to balance and or compliment what I was dressing. Someone, I can’t remember who, told me that to make a very basic vinaigrette you used 2 parts oil to 1 part acid. I have found that this is a really good rule of thumb. That being said, making your own allows you to play and tailor your dressings to what you like best. I prefer a little more acid in my dressings so that is what I do. I have not included actual measurements in any of the recipes that follow as I make pretty much all of them to taste and add whatever I think might be missing. This is part of the fun of cooking, a little taste and adjustment to make something a little bit better. So here are three of my favorite homemade dressings. Play with them as much as you like.

Simple Vinaigrette to the tune of  “What I Got” by Sublime

2 parts olive oil
1 part vinegar, I tend to lean towards apple cider or a wine vinegar but you can used whatever you like
Garlic crushed or minced, basically as fine as you can get it
A bit of decent mustard
Salt to taste

I combine all of the ingredients in a jar or a measuring cup and then blast them with my stick blender and I am done. If you don’t have a stick blender, combine them in a jar put on the lid and shake the living heck out of them. There you go, you just made salad dressing.

Caesar Salad Dressing to the tune of “Squeeze Box” by The Who

I make this a lot when I am having friends over for a meal and it always is a hit it seems. I believe that what makes it great is that it includes an ingredient that everyone thinks that they don’t like, anchovies. Please at least try it with the anchovies before you omit them. The thing that I do omit mainly due to the paranoia instilled in me by my wonderful and cautious mother is the raw egg yolk that is used in the traditional recipe. I sub in a little bit of mayonnaise to add that richness to the dressing.

2 parts vegetable oil
1 part lemon juice, preferably fresh squeezed
A couple of anchovy fillets
Worcestershire sauce
Some mayonnaise
Roasted garlic
Grated parmesan cheese
Salt to taste

Roast your garlic in a 400 degree oven until it is soft.

Throw all of your ingredients into a jar or a measuring cup and blend with a stick blender. If you don’t have a blender pulverize your ingredients with a knife and then use the shake the heck out of it method mentioned above. You have now made Caesar Salad dressing.

Coleslaw Dressing to the tune of “Beautiful Mess” by Jason Mraz

2 parts vegetable oil
1 part vinegar
Grainy mustard
Sour cream
A little bit of milk
A dash of sugar
Salt to taste

Combine and then blend or shake the heck out of it.

You can add whatever you want to these basic recipes, they are a great place to start. Enjoy my lovely people.

Wednesday, 21 December 2011

Brisket Via the Slow Cooker


            It seems to me that time is becoming a very valuable commodity these days. I talk to my friends and they all tell me that they don’t have time to put together a meal so they end up grabbing something on their way home from work and end up feeling a little ill and a whole lot sweaty by the end of eating. So here I go, delving into a bit of a paradox, using a slow cooker to make a fast and easy meal. The speed of this kind of cooking comes from a little bit of prep and allowing your slow cooker to do the work while you are at your job or out running all of the errands that you busy people need to run.

            Now I will say here that I love my slow cooker and I think that everyone should have one: for real, everyone. They make life so much easier and allow you to have a great meal waiting for you when you get home. I recommend getting the biggest one that you can afford. It is simply easier to have too much space than not enough. The other thing to look at, and this is more for my mom than anyone else, is to make sure it has long cord. My mom is very cautious when it comes to leaving appliances on when she is not at home so a long cord allows her to leave the slow cooker in the empty kitchen sink away from anything flammable while she is away. So that tip is for you Mom. The results that I get when I use my slow cooker have always been fantastic, from roast beef to soups and stews, they all turn out great.

            So here is a recipe that I made on the weekend in slow cooker it got thumbs up from my buddy Toby so it must have been a bit of alright.

Brisket on a Roll to the tune of Float On by Modest Mouse

2lbs of Brisket with the fat cap on
½ a bottle of red wine
4 cloves of garlic smashed
Salt and pepper

The prep of this takes about 15 minutes and when you get home you will be greeted by one of the best smells in the world.

-salt and pepper your brisket liberally while you heat up some oil in a large. Sear off the meat on all sides about 3-5 minutes a side. Remove from pan and transfer to your slow cooker.

-add your wine and your smashed garlic. Put on the lid set it to 6 hours on high or 10 hours on low. Now go about your business.

-When you get home pull your hunk of Brisket out of the slow cooker and let it sit for about 5 minutes or so then slice it up and pile it on a roll with your favourite condiments and sandwich stuff, like lettuce and tomato, etc.

            There it is super quick yet kind of slow dinner. I hope that it is as awesome for you as it was for me. Give it a go.

Monday, 12 December 2011

Salmon For a Friend


            So my friend Jill tells me that she needs some help with her cooking. This girl can cook; she simply lacks a little confidence which I am hoping I can help with. It is very easy to read through cook books and be intimidated by technical terms and beautiful pictures. I am also hampered by the fact that she does not eat meat but rather only seafood and vegetables, so no easy to cook pork chops or steak for us on this day. I think to myself what we should do and I land on salmon. I invite Jill over to my place and we get to cooking. We do salmon three different ways to show the versatility of a great protein. We started with a cold salmon, rice noodle salad with cherry tomatoes and cucumber, we moved on with soy, honey glazed salmon served over cauliflower puree and we finished with a coconut packaged salmon served over a fresh salsa. It sounds like a fairly intimidating menu but I asked Jill if she could do it again and she said yes. If you have any problems pulling these recipes off you can talk to her.
           
            I asked Jill for her favorite, the recipe that she would make again, and she said that she fell in love with the last course. So, here is my little coconut salmon package. Jill and I rocked some tunes as we were cooking away but the one that stuck in my head was Learning to Fly by Tom Petty. So put on the best bar band in the world and let’s cook some salmon.

            Salmon Cooked in a Package to the tune of Learning to Fly by Tom Petty and The Heartbreakers.

The salmon part:

2-3 fillets of salmon about 4 inches wide.
1 lemon sliced, you could use lemon grass but we didn’t have any.
½ onion finely diced
1 clove of garlic minced
2 tbsp of dill finely chopped
½ a can of coconut milk

-Grab a large piece of foil and lay it out flat. Place your fish in the center and fold up the edges of the foil to make what looks like a rectangular bowl.

-Add in the rest of the ingredients over top of the salmon and then fold the edges of the bowl up together to seal everything in.

-Place in a baking pan to catch any drippage that may occur and bake in a 350 degree oven for 15 minutes or so. Remove from package and serve.

Now for the Fresh Salsa part:

cherry tomatoes
diced onion
avocado cut into small chunks
rice wine vinegar
The proportions of this are all about what you like so mess around with it a little so you get something that you like the taste of.

-put onion in a bowl and add vinegar, let sit for about ten minutes.

-mix in your tomatoes and avocado and serve. Easy peasy.

Plate in a way that you think is pretty and there you go: Salmon for Jill. Give it a go and enjoy.    

Three Days to The Glory of Pulled Pork


            So I posted a picture of it and you, my readers, have asked for it. Today we are delving into the glorious world of the pig once more. Now as food trends go this is one that I can totally get behind. I am talking about pulled pork, people. It seems that it is suddenly offered on every menu no matter where you go. I like to think that it is because digging on swine is awesome and pulled pork showcases this fact in stunning fashion. Eating a good pulled pork sandwich, to me is like watching Bobby Orr score his leaping goal or holding someone’s hand for the first time, it just puts a dumb grin on your face. So here we go, let’s pull some pork.

            Now the key to this recipe is one that I suck at: patience. I joke that it took me 3 days to make this recipe, and that is only sort of true. The actual time you spend actively cooking is relatively small but there is a lot of waiting for the magic to happen. The way that I make pulled pork consists of three very important stages: brining, dry rub, and then the actual cooking. Each of these stages takes about 30 minutes of actual time in the kitchen. The rest of the three days is all waiting. The result is ridiculously tender and juicy pulled pork that is making my mouth water just from thinking about it.

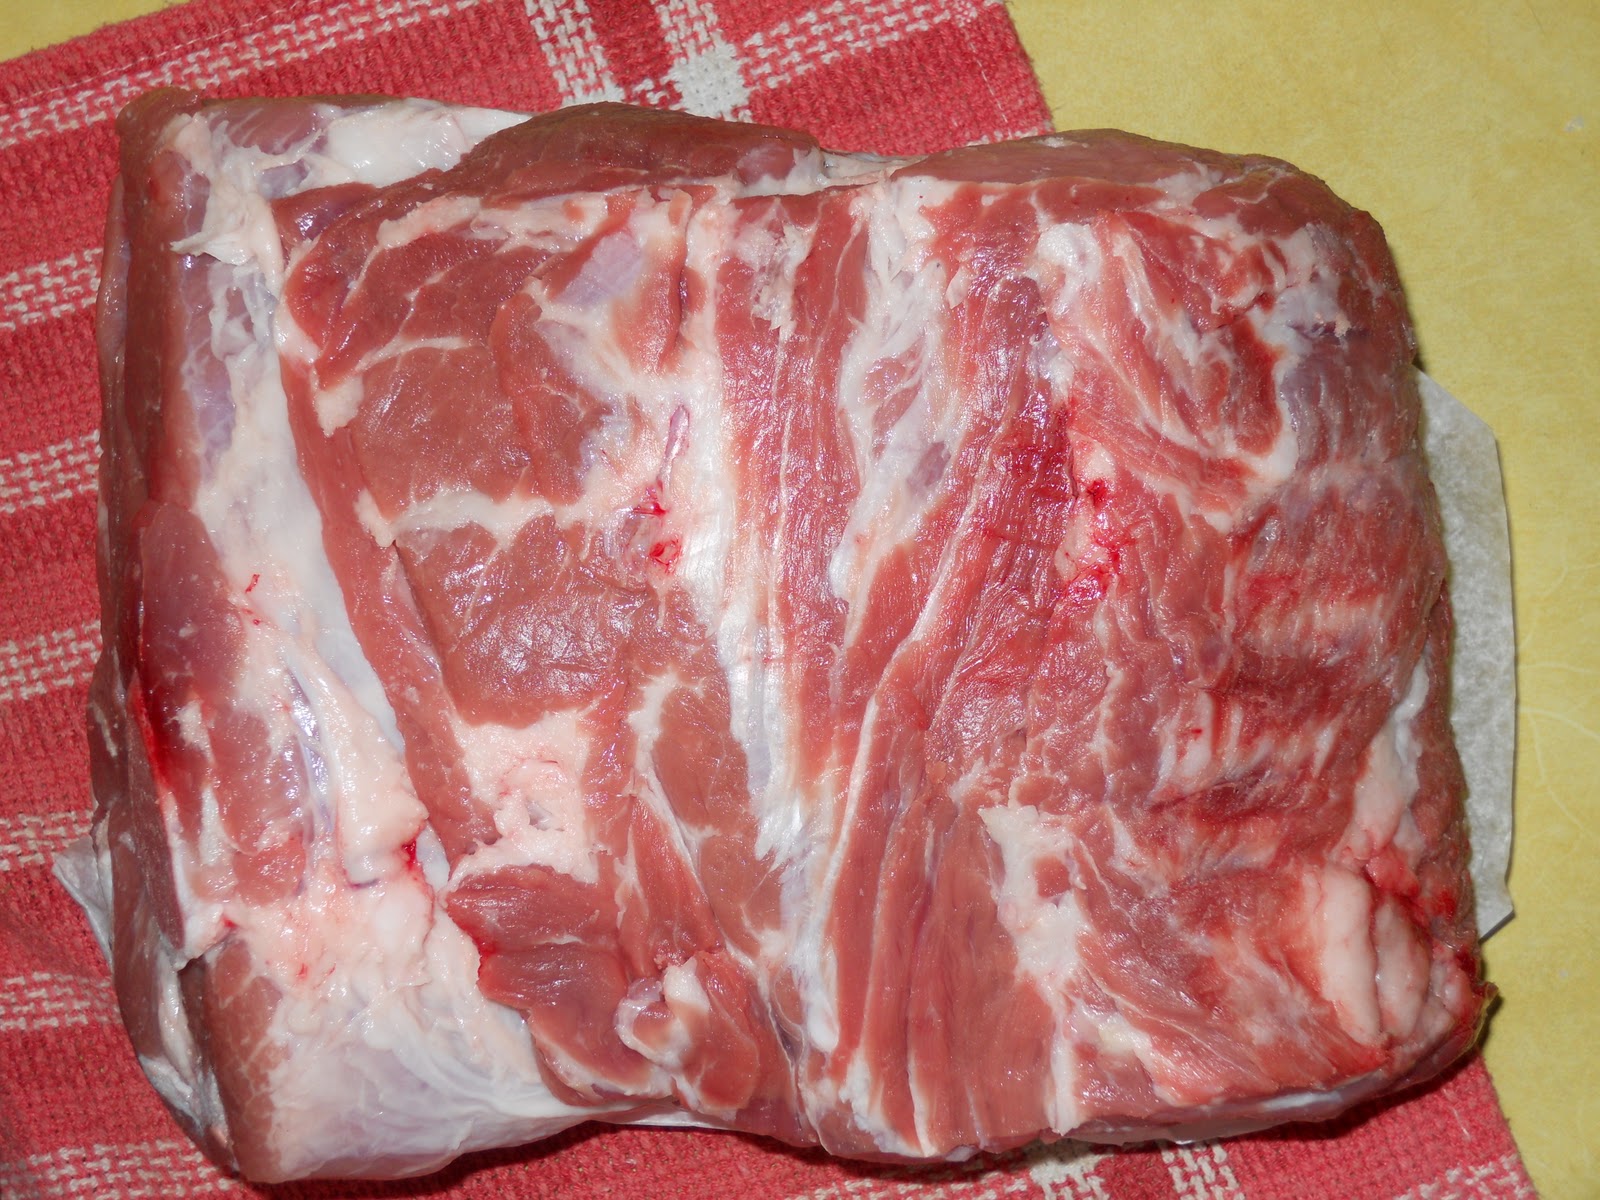
            But first things first, let’s talk about the pig. I use pork shoulder, mainly because it has some fat in it and you want that. Trust me you want that. If Emeril has taught us anything it is that pork fat rules. You want to make sure that the fat cap is still on your shoulder, the creamy white layer of fat, because that is the good stuff. You want to trim off any fatty stuff that is shiny, because it won’t break down and you will end up with chewy bits of gristle and no one wants that. Your butcher can help you get what you need. We all know that you need to be good to your butcher because he or she will tell you things like when they get their locally raised and hormone free piggies delivered. That is always a good thing.


            Okay step one: the brining. This sounds very fancy but really all it is is soaking your meat in a salty water mixture to allow it to tenderize. Here is the recipe for the brine, it is really easy.
Simple Brine

Enough water to submerge your pork
½ cup salt
A handful of peppercorns
8-10 bay leaves
-In a stock pot dump all of the ingredients in bring to a boil for a couple of minutes

-Remove from heat and let cool completely.

-Brine is done. Put your shoulder in and completely submerge it, you may need to weigh the sucker down. Cover with cling wrap and put it in your fridge for 12-16 hours. I warned you that you would need patience.


            It is now the next day and your pork is been brining away as you slept. Pull the piggy out of the brine and give it a rinse. It is now time to get your rub on. I use a dry rub made up of equal parts chilli powder, onion powder, and garlic powder with some salt and cayenne pepper. This stage is more about what you like more than a set recipe. Pick the flavours that you like and get a little creative. Coffee works in this stage if you are feeling a little adventurous. Mix your rub up and work it into the meat, coating it completely. Cover with cling wrap and let it hang out in your fridge for another 12-16 hours. I recommend that you do this step early in the morning. You will understand why when we get to the braising part. So the rub is working for you, go about your business, go to work, come home, and check out how your shoulder is doing. If you are like my buddy Toby, you can speak in softly to it.

            Okay my lovelies we are on the final step, pulled pork is only 12 hours away, let us braise. The focus of this step is low and slow. If you are going to braise in the oven, which is how I do it, you are looking a temperature of about 225-250 degrees. If you have a slow cooker this is a great use of it. Set it on low for 10-12 hours and then you can finish it in the oven. Now you can get up early in the morning put it in the oven but I hate the morning and being a bit of an insomniac I get it going in the wee hours of the morning before I go to bed. This is around 3am. The choice is yours. I also make my own barbeque sauce that I use in the last stage of the cooking. I have included it at the end. Here we go, the last stage, I can almost taste it.

The Final Stages of Pulled Pork
1onion roughly chopped
6 large cloves of garlic smashed
3 bottles of beer
Water
Your pork shoulder
Barbeque sauce

-put your pork into a roasting pan and add all of the ingredients.

-Shove it into a 225-250 degree oven and let it braise for 10-12 hours.

-when you take it out you should struggle pulling it out of the pan, it should be that tender, falling off the bone tender.

-discard the stuff that is left in the pan, it has given you all it has to give. Give the pan a quick wash and return the shoulder. Using your hands or a couple of forks pull the pork apart so it looks like it has been shredded.

-add in your barbeque sauce and mix it all together. You can pop it back into the oven if it has cooled off too much. Serve on a good roll with some coleslaw on or on the side.

            So while you are waiting for the glory of your pulled pork to cook here is a recipe for a homemade barbeque sauce that I use in the finished product. I paired it with one of my favourite tunes from Yukon Blonde. I know that Brandon, Jeff, John, and Graham Jones would approve mainly on the merits of the liberal use of bourbon. Enjoy.

Bourbon Barbeque Sauce to the tune of The Bride’s Song by Yukon Blonde

1 onion finely diced
2 cloves minced garlic
2 ½ cups of tomato ketchup
2 tbsp grainy mustard
A good glug of apple cider vinegar
A good glug of molasses
4 oz of descent bourbon
A little bit of water to thin everything out

-In a sauce pan cook the onions and the garlic until the onions soften and they go translucent.
-Add in all of your other ingredients and whisk the crap out of them to combine. Bring to a boil and then lower the heat and let it reduce until it looks like the consistency of barbeque sauce, by about a third.
-Throw into your pulled pork hot off the stove or let cool and refrigerate.

There you go, awesome Pulled Pork in only 3 days. Enjoy.  

Tuesday, 6 December 2011

Biscotti


Now here is something a little sweet. We are approaching the holidays and in the house that I grew up in that meant fresh baking. It was the one time of year that both my Mom and my Grand both were in their respective kitchens baking away. The fare in my family consisted of sugar cookies, soft shortbread, rum balls and tarts three ways: cherry, butter, and mincemeat. So as I strike out on my own I have found something a little different to add to the holiday baking. Today we are going rock on some biscotti. The cool thing about this twice baked cookie is that it makes a great homemade and fancy sort of gift. Find some cheap jars with a flip lid at your local dollar store and fill them with these coffee friendly cookies and there you have a great gift at a low cost. On top of that, these cookies turned out great when I made them so give them a shot. Whether you are giving or you just want to eat them, they are pretty darn tasty.

            Just a little note here that you can add nuts or any other sort of dried fruit to this recipe and it works great. This is a riff on a recipe that I got from James Peterson’s Baking, it is like my baking bible. Let’s delve into some cookies shall we. So here we go with biscotti so put on The Decemberists, and bake your brains out.

Lemon Cranberry Biscotti with White Chocolate to the tune of Don’t Carry It All by The Decemberists

2 cups of flour
1 tsp baking powder
½ tsp salt
¼ tsp cinnamon
¾ cup sugar
2 eggs
¾ cup butter melted
¾ cup dries cranberries soaked for 30 minutes in warm water, drained
the zest of 3-4 lemons
½ a package of white chocolate chips

-preheat oven to 350 degrees and line a sheet pan with parchment paper

-I use a stand mixer for this one but you can totally do it by hand. Combine flour, baking powder, salt, cinnamon, and sugar.

-add eggs and butter and mix until the dough comes together. Mix in cranberries and lemon zest.

- roll dough into two logs about a foot long on the sheet pan and flatten with your hand so they are about 3 inches thick. Bake these suckers for about 30-35 minutes.

-yank them out and let them cool for about 15-20 minutes. As they cool lower your oven temperature to 300 degrees. Once cooled slice the dough on the diagonal into slices about the width of your index finger and lay them onto a freshly lined sheet pan and bake for another 30 minutes or until they turn golden brown.

-pull them out and let them cool completely on a cooling rack

-while they are cooling melt your chips in a double boiler and let stand for a couple of minutes

-smear the white chocolate on the bottoms of the biscotti and stick them in the fridge so the chocolate can set up

-shove them into jars for gifts or make a pot of coffee and enjoy yourself.

So there you have biscotti. Give it a go and let me know what you think.